Servicing the Hammond B-2/C-2 Type Pre-Amp

Table of Contents
AO10 Layout
AO10 Schematic

General Description

The AO-10 tube pre-amp is found in the Hammond B-2 as well as several other models. C-2, RT-2.

Designed in the forties, this pre-amp remained in production until 1948. And, it remains fully functional and serviceable today. This discussion is designed to help owners do some basic troubleshooting and, we’ll get into some depth of circuit operation as well as common problems usually found here.

First, let’s look at the preamp and determine where things are located.

AO10 Layout A
  • T-4 Power Transformer.
  • V-5 6X5 Rectifier Tube.
  • V-3 6SN7 Output tube. Also serves as the vibrato drive tube.
  • V-4 6SC7 Preamp tube.
  • V-1 6SJ7 Input tube. This is the non-vibrato input preamp.
  • V-2 6SJ7 Input tube. This is the vibrato input preamp.
  • T-3 Output transformer.

Input Stages

AO10 Layout B

If the vibrato switches are set to vibrato off, the signal from the matching transformer goes into “No Vib”, a screw terminal located on the preamp. If you had a problem with the non-vibrato sound, it would likely be in this area. Basically the signal is routed to the input grid (pin 4) of the 6SJ7 tube for amplification. The voltages shown are usually the first thing to check. If the tube is good, then the two most likely sources of problems will be R7/R8 (plate load resistors) or R6 (screen grid resistor). If you check the plate voltage for example and it reads low, then the plate load resistor R7 or R8 is probable going bad. (opening up) If however the voltage on the plate reads high, then the screen grid resistor R6 is going bad. (opening up).

Since the vibrato (V2) and non-vibrato (V1) tubes are the same (6SJ7), you can swap them to determine if it’s a tube problem.

Also check pin 6 for the 1.5V from V2.

Common Problems:

  • Plate load resistors R7/R8 opens up and the plate voltage goes down.
  • Screen grid resistor R6 opens up and the tube stops conducting.
  • The tube itself goes bad.
  • The capacitor C-2 can cause a “thump” when switching the vibrato tabs.
 
AO10 Layout C
The vibrato input is nearly the same as the above but for a few differences. First, the 1.5Vdc is actually created here on V2’s pin 5. This reference voltage is used on several other tubes. Second, the output goes into the vibrato delay line driver tube. This is one-half of V3, the 6SN7 output tube.

Again the plate and screen voltages should be checked on V2 like above. Additionally, the voltages on V3 should be checked. Any loss of amplification here will cause the vibrato to either be weak or not work.

Common Problems:

  • Plate load resistor R17 opens up and the plate voltage goes down.
  • Screen grid resistor R16 opens up and the tube stops conducting.
  • The capacitor C-11 can cause a “thump” when switching the vibrato tabs.
  • The tube itself goes bad.
  • V3 fails.

Volume Control Section

AO10 Layout D

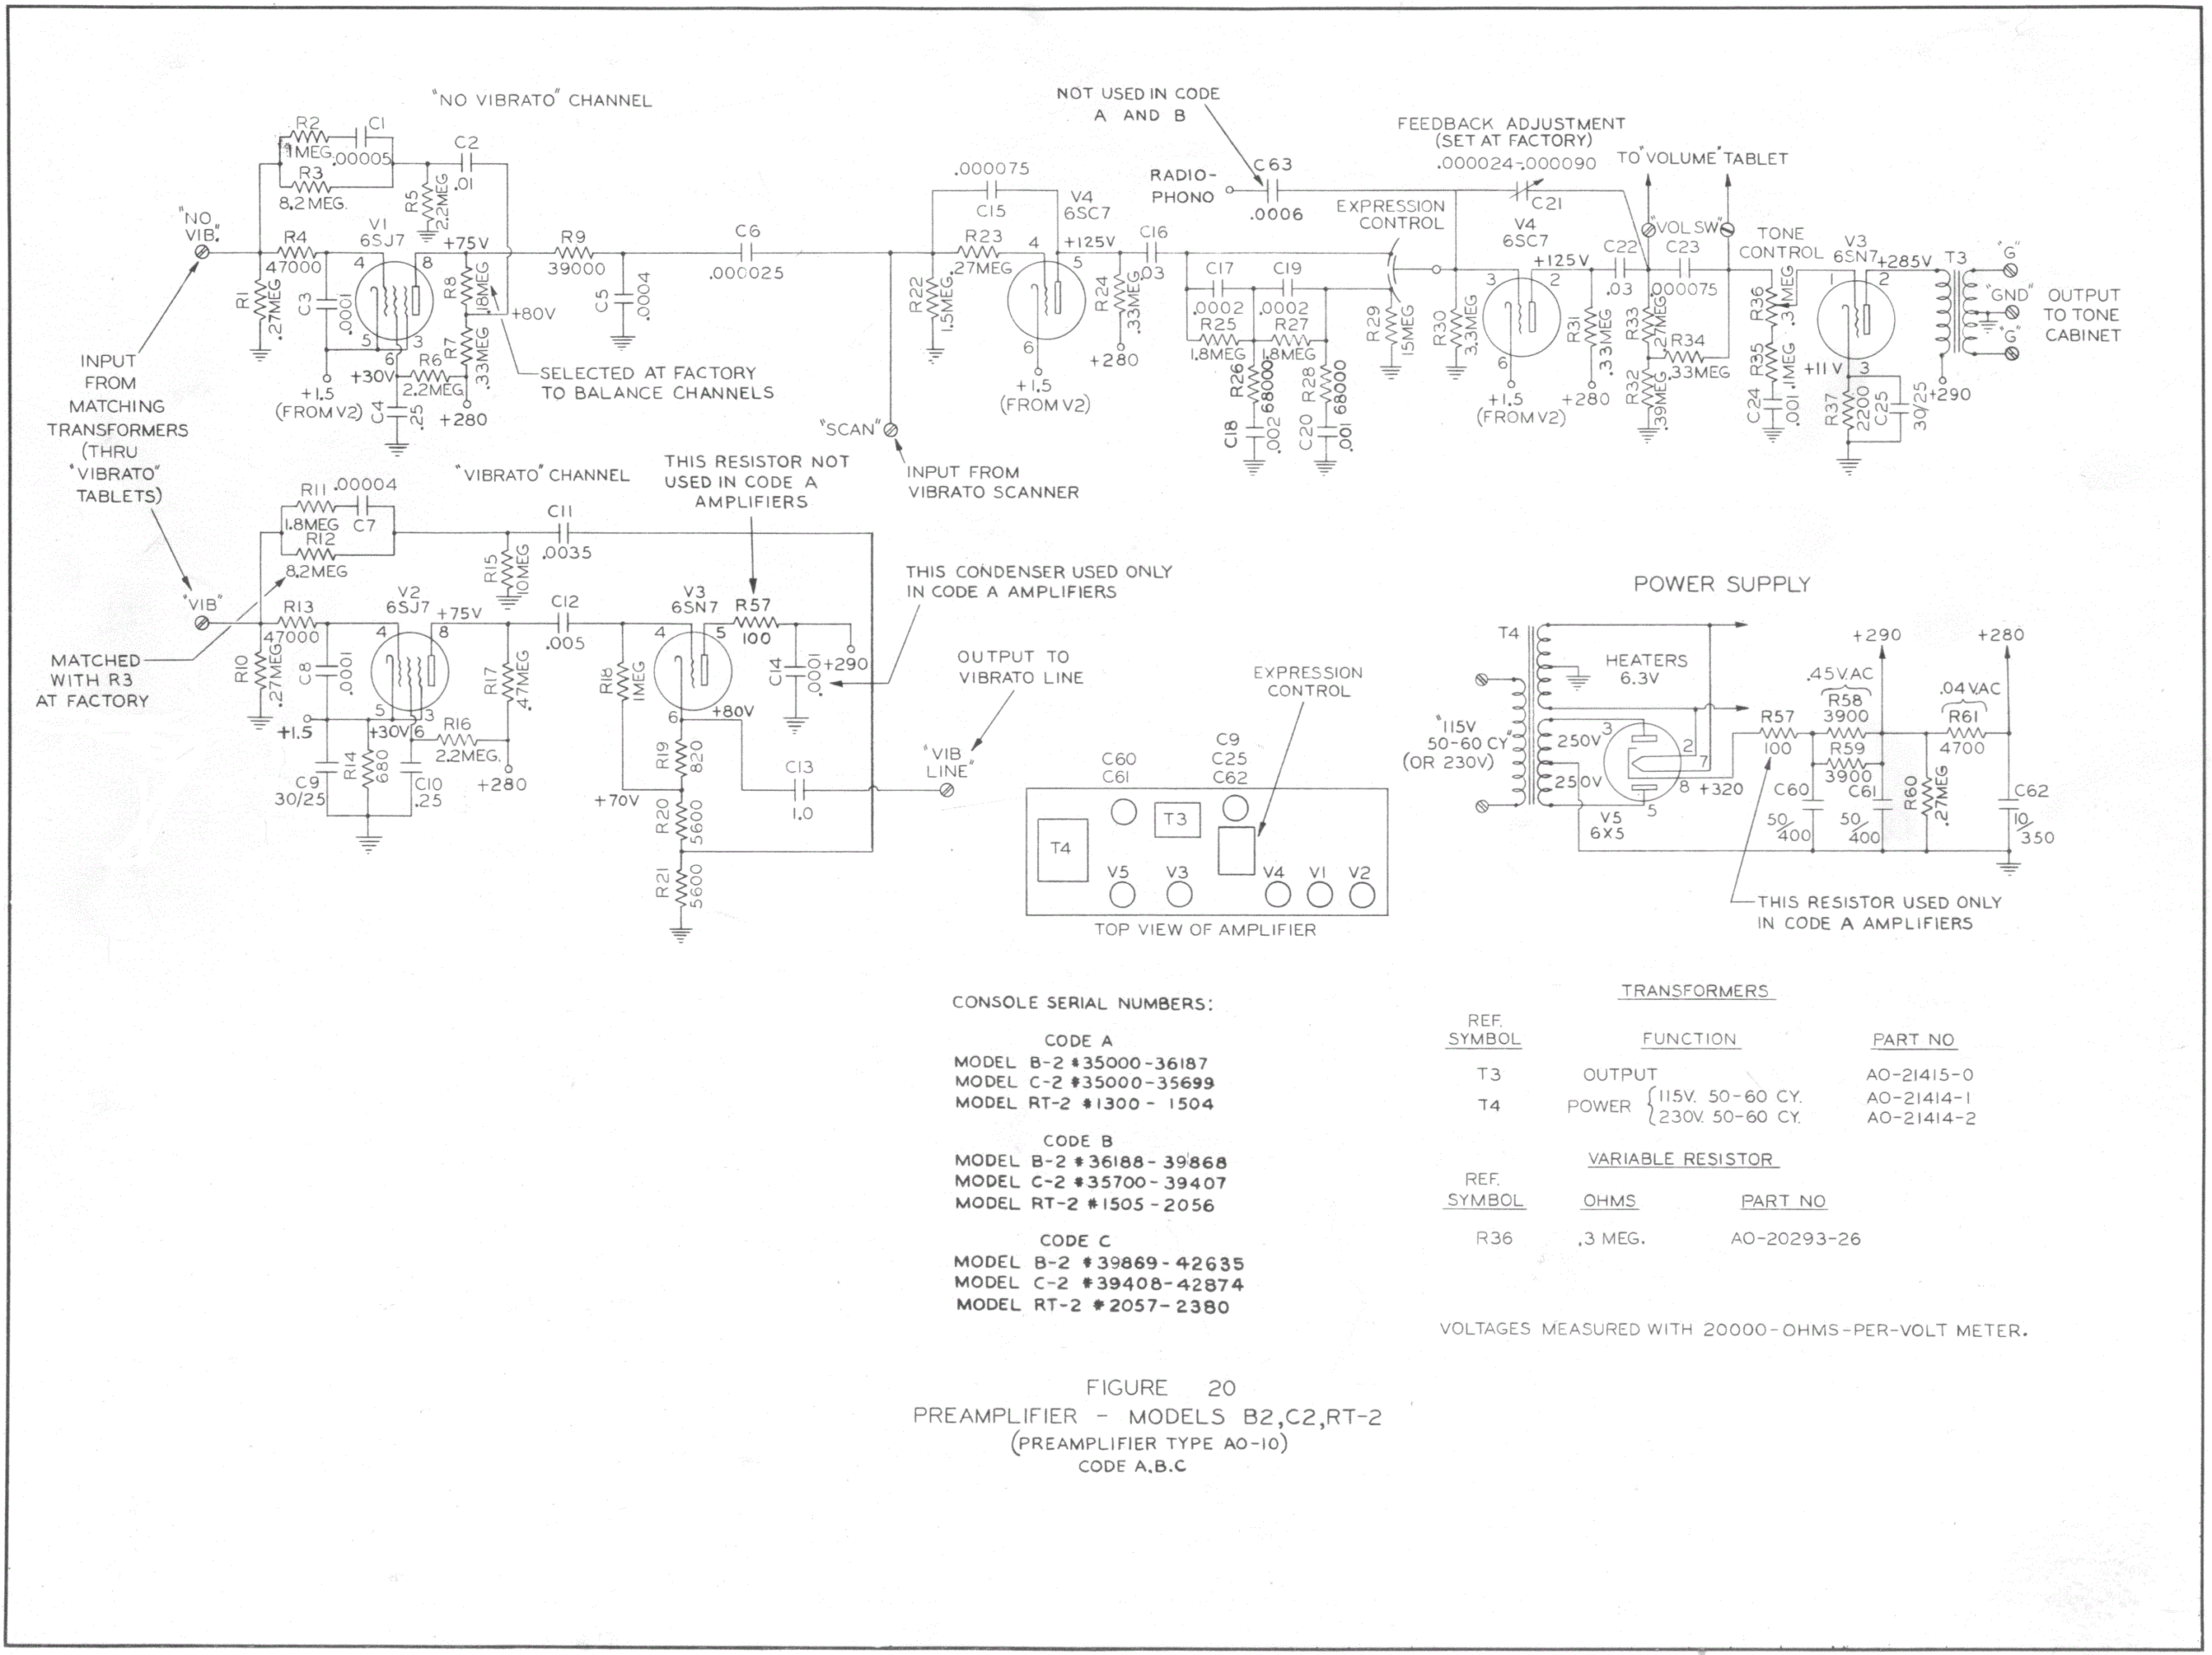
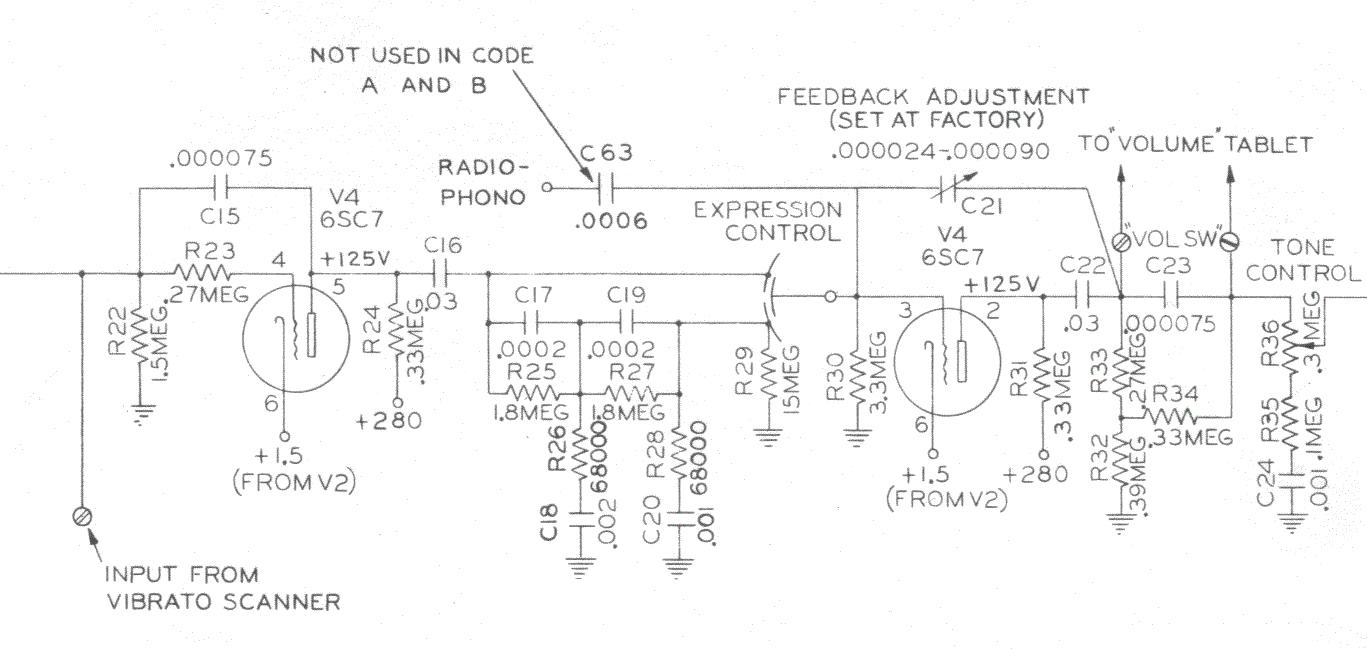
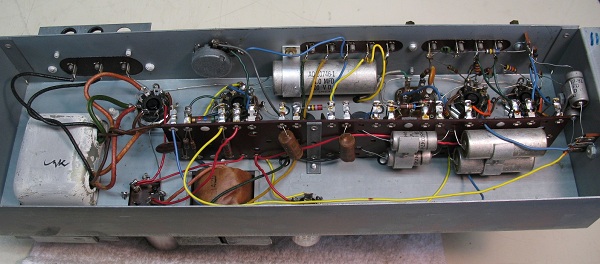
V4 is a dual triode tube. The first stage V4a accepts signals from the non-vibrato preamp and the vibrato scanner. These signals are again amplified to a sufficient level to drive the expression control. The main service concern here would be the plate voltage. If the plate voltage is low, then the plate load resistor R24 is likely going bad (opening up). If it is high, and since there is no screen grid, the tube itself is likely going bad.

In the expression control circuit, you will see there are two plates shown after V4(a), and a third movable plate shown going into the next stage of V4b. The higher plate is connected directly to the output of V4a, while the lower plate has some RC (resistive/capacitive) circuits shown. If the movable plate is closer to the higher stationary plate, the volume is louder. As it moves to the lower stationary plate, it gets softer. Because of the RC network, the signal also gets a tone change.

In other words, the high frequencies are attenuated faster than the lower frequencies. This means at lower volumes, the bass will actually remain more present than the highs. Since we hear different frequencies differently at different volumes, (see fletcher-munson curves) this acts like a loudness curve in a home stereo.

The second stage of V4(b) picks up the signal from the expression control, amplifies it and sends it to the output stage through the tone control. Again the plate voltage is the primary check. Determine if the tube or plate load resistor is bad. A failure in either stage of V4 will usually kill all sound in the organ.

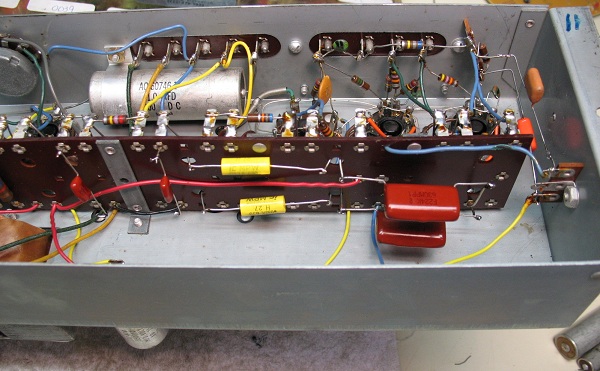
The tone control is a passive circuit and in reality, it only attenuates the highs. It can be a source of problems if the potentiometer R36 is scratchy. If you have the preamp turned up to expose the underside, always clean this pot with some good quality cleaner such as De-oxit.

Notice C21 which is a feedback capacitor in the second stage of V4(b). This cap takes some of the output from V4(b) and sends it to its input. Since the output is 180 degrees out of phase with the input, it reduces the gain of that stage. It is set at the factory and in general, you set it by turning the screw located in the expression box clockwise all the way in. Then turn it counter clockwise 1 1/2 turns. This should not be played with as a volume control. Even though it does affect the volume, it also affects the frequency response and should be set close to the factory setting.

Also notice the reference to the volume tablet. This is where the volume soft/loud tab connects. By shorting out C23, the volume is raised. I mention this because there is a typical problem where when switching the soft/loud tab, you hear a thump or pop. This is due to C22 going bad. (leaking DC)

Common Problems:

  • Plate load resistor R24 opens up and the plate voltage goes down.
  • Plate load resistor R31 opens up and the plate voltage goes down.
  • The tube itself goes bad. (6SC6)These tubes are typically noisy and cause static.
  • The socket for this tube is also problematic as they get older.
  • C22 leaking causing a pop when switching the volume tab.

Output Section

AO10 Layout E

V3 is the final amplifier of the preamp. This 6SN7 is a dual triode where one stage is for preamp output and the other is used after the V2 vibrato preamp to drive the vibrato delay line. The signal is taken from the tone control, goes into pin 1 input grid, and outputs on the plate to drive the output transformer. Obvious check points are pin 2 plate and pin 3 cathode. A shorted C25 could cause the cathode voltage to be low. An open R37 could cause it to go way up and result in little or no amplification. Output transformers rarely fail so a loss of plate voltage is unlikely. The transformer converts the single ended signal into a balanced signal. It’s output is available on the “GG” terminals. A quick check of the overall gain of the preamp is to turn the expression pedal all the way up. Pull out the four lower drawbars on either manual. Play a “C” chord in the middle of the manual. You should read about 3 to 4 Vac across the GG terminals.

Common Problems:

  • V3 6SN7 tube fails although they are very hardy.
  • Dirty Tone control causing static or no sound.C25 shorts or opens. Check the 11Vdc. An open cap symptom will be less bass.
  • Output transformer can open up or get noisy although rare.

Vibrato

AO10 Schematic

As far as the preamp goes, the vibrato signal is sent from V3 to the delay line. The delayed signal is scanned by the scanner and returned to the preamp on scan terminal.

Learn more about the delay line and scanner.

Final Thoughts

No Sound:

  • Check that the tubes are lighting up and the Generator is running.
  • Check the left most rectifier V5. Try replacing it.
  • Set up the organ with first 4 drawbars on either manual, full expression, hold down a C chord in the middle of the manual while checking for AC voltage on the GG terminals. If you have voltage, you may have a problem in the speaker amplifier.
  • Make sure the expression linkage is working and properly adjusted.

Weak or no sound on either the Vibrato or non-vibrato setting:

  • Swap V1 and V2 and see if the problem moves.
  • Lift the chassis and check the voltages on the questionable channel.(V1=non-vib, V2=vib)

General static in sound or even when not playing:

  • Slightly move each tube and listen for noise. Pull tubes, clean pins and replace.
  • Try tapping each tube and listen for noise. Any microphonic tubes should be replaced.
 
Here’s a picture of the underside with stock parts
Here’s the same preamp with the coupling caps replaced

Share:

Facebook
Twitter
Pinterest
LinkedIn

Comments

Table of Contents

Scroll to Top